Published on :Nov 23, 2015
Since spree has been sold, I thought it might be good idea to setup tutorial to create ecommerce with alternative.
Here we will use solidus which is a complete open source e-commerce solution built with Ruby on Rails. It is a fork of Spree.
New Rails Project
Lets start with setting up new rails project.
rails _4.2.6_ new merchant -T -B --database=mysql
# -T skips unit test (we will use rspec)
# -B skips the bundle install after all files have been generated
# --database=mysql specifies database to be used is mysql
Now cd to the project directory and let's init git
cd merchant
git init
You may copy .gitignore content from here to avoid tracking unnecessary files to your repo.
Create .ruby-version to specify ruby version.
echo '2.3.1' > .ruby-version
Adding Solidus gem
Now let's add solidus to our gemfile:
gem 'solidus'
gem 'solidus_auth_devise'
Run the bundle command to install.
$ bundle
After installing gems, let's setup database. My config/database.yml looks like this:
default: &default
  adapter: mysql2
  encoding: utf8
  pool: 5
  username: root
  password:
  socket: /var/run/mysqld/mysqld.sock

development:
  <<: *default
  database: merchant_development
test:
  <<: *default
  database: merchant_test
production:
  <<: *default
  database: merchant_production
  username: merchant
  password: <%= ENV['MERCHANT_DATABASE_PASSWORD'] %>
Now you need to run `rake db:create' command to create database.
Then, you'll have to run the generators to create necessary configuration files and migrations.
bundle exec rails g spree:install
This may take a while but after some time you will be prompted to create admin user. Enter email and password and youe will see success message.
Create the admin user (press enter for defaults).
Email [spree@example.com]: prakashpoudel@lftechnology.com
Password [spree123]:
Done!
     loading  sample data
      insert  config/routes.rb
**************************************************
We added the following line to your application's config/routes.rb file:

    mount Spree::Core::Engine, :at => '/'
**************************************************
Spree has been installed successfully. You're all ready to go!

Enjoy!
The line below is copied from solidus's instruction and I expected it to copy migrations to my app but my terminal gave me no hint what it did! Then I ran rake db:migrate and again terminal gave no hint of what was happening but I guess that won't cause me problem because bundle exec rails g spree:install has already installed necessary migrations.
bundle exec rake railties:install:migrations
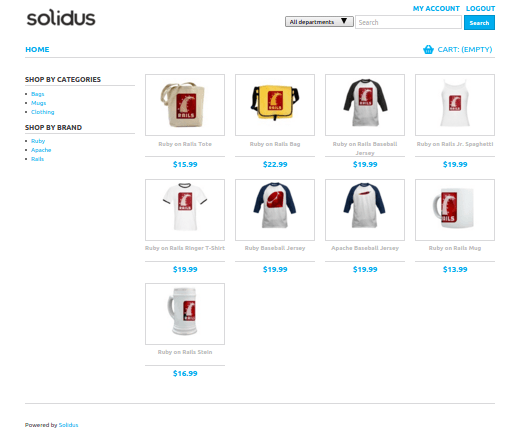
Let's see the output of our hardwork now! Run rails server!
rails s
Visit http://localhost:3000/ to see your store.
Your admin section will be in http://localhost:3000/admin

We will do slight customisations of this store in next post.